I mentioned in my last blog post that we will be looking at 3 common web application hacker tools but lets draw back that ambitious statement and start with one. I've already downloaded and installed Paros, so I'll start with that one. You can find this sweet tool at http://www.parosproxy.org/index.shtml. The version that I am using is version 3.2.0 released on November 2004.
For Windows installation it was easy, as I just let the Windows installer install itself but you must also download the latest Java JRE to get it to run correctly. Downloading and installing Java will be beyond the scope of this posting.
To set up Paros as an HTTP proxy you will use port 8080 for proxy connections and 8443 for SSL handling. Browse my last blog posting on HTTP proxies and how to set those up in your Internet Explorer, Firefox or Opera web browsers.
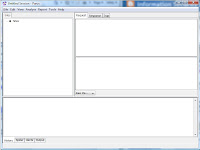
 Once you have installed Paros, click on the launcher and you should see the Paros home page like this.
We will illustrate the value of a tool like Paros by practicing the first approach of a hacking session by what is called "mapping the target application." Mapping the application will give a hacker a better understanding of what the application is about and what the hacker is up against. According to the Web Applications Hacker's handbook, begin mapping by enumerating the applications' content and functionality in order to see what the application actually does. Some of the content will be easy to find and some will be hidden away and requires a little sleuthing to uncover. This is where the toolsets shine.
In the typical application, the majority of content can be discovered by manually browsing. The basic approach is to start at the home page and navigating through all the links and menu options until you have created a 'site map'. If the application already has a site map, that makes it easier - start there. As you can see, manually mapping and creating a rigorous inspection is a daunting task.
Web Spidering
Paros includes a tool called a web spider. This tool works by requesting a web page, parsing it for links and other content, then requesting those, continuously recursively until no new content is discovered.
Spiders attempt to acheive a high level of coverage by even submitting random and preset variables in parsed HTML forms. The spider can then analyze the response for even more valuable information. This allows spiders to walk through wizards and other mulit stage functionalities. Some other spiders can also parse Javascript to extract even more URLs and content.
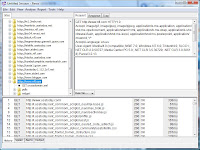
To use Paros' Spider, you must first browse a site in a proxy session. Here is a screen shot once I've visited NFL.com:
 To spider using Paros, you have to first browse the site and it will start adding the history to the left hand tree view. Notice all of the click thru URLs that it captures!
Select one of the sites in the tree view, I'll select NFL.com and choose Analyse -> Spider. Paros will bring up a dialog and start crawling...
You can tell Paros where to spider by directing the spider. The next steps that you can take is to manually and auto spider. See what the tool discovers and you don't. Then you can see if you can figure out why you couldn't discover some of the content that Paros does. Use Paros to discover valuable hidden content. Examine any error messages that are generated to see if you can figure out the technology behind the application. Hackers use this information to launch more sophisticated attacks.
That's it for this blog posting. The next posting will continue with Paros spidering and examine more advanced features and usefulness of application spidering. Now create those site maps and examine what you discover and what Paros discovers.
I shouldn't be doing these scans against sites like NFL.com. For a list of sites that you can use to scan and use tools such as this, check out my blog posting from August 19,2009.
ReplyDeletethnkyou
ReplyDelete